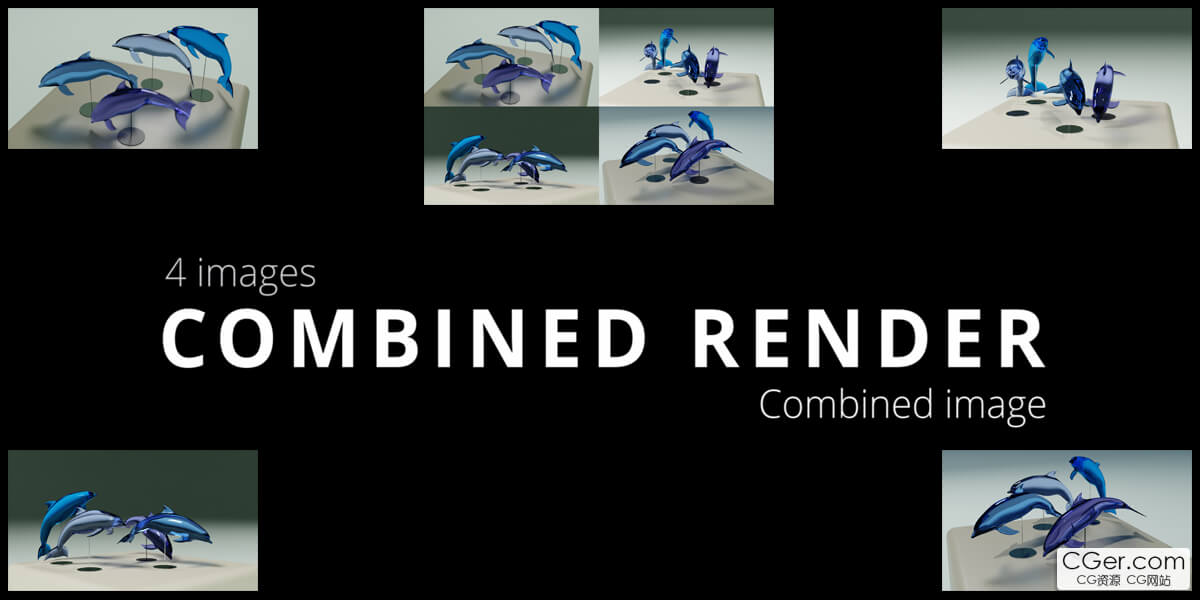
Combined Render v1.0
Combined Render是一个Blender的渲染设置插件,可以让用户同时设置多个相机个渲染预设,支持多场景相机,多个对象相机,多个跟踪物体的相机。简化用户的渲染流程。

If you have your scene composition ready to render, and you have not already got 4 scenes in your blend file, you press the 'Add 3 scenes Copies' button'.
This will make 3 exact copies of the selected scene.
If there are more than 4 scenes available, there is an option in the panel where you can select 4 scenes.
Now that you have 4 scenes available, you can adjust your camera distance to the 3D cursor if needed.
4 Scenes Camera:
Pressing the 'Add Cameras' button will add a camera to each scene that was checked in the panel.
You will see that for each checked scene, there is a camera added at the distance you have set previously.
By pressing the 'To Scene' button, next to the scene name in the panel, there can be switched between scenes to make adjustments in that scene.
Each checked scene, will have a collection where the camera and linked empty is located.
For each scene, you adjust your camera as desired.
The camera will always follow the position of the linked empty.
When everything is set and you like to have your renders, you add a name for your image, select your render output path and select your resolution.
The default is the 1920 by 1080, but can be changed to your need.
Pressing the insta-default button, will switch to Instagram resolution, or back to the default.
Pressing render will render 5 images.
One image for each camera of the selected scenes and 1 combined image of all 4 cameras.
By default, the selected folder will open, once the rendering is done.
Object Cameras:
If you want to have a more product like render, where you need some shots from the front, top, left and right, you use the 'object cameras' panel functions.
Choose your scene if you have more than 1 scene.
You select your object and press 'add view cameras'.
Four cameras are being added facing the object.
Selecting the camera positions in the panel, will switch between the 4 views.
The camera will always be facing the object if moved.
Moving the empty or object has the same result.
The camera settings can be changed for each view.
Tracking another object:
Select the other object, press the 'track selected object' button first and the 'center cameras' button last.
Now this object will have the cameras following its position.
You add a name for your image, select your render output path, and select your resolution.
The default is the 1920 by 1080 but can be changed to your need.
Pressing the insta-default button will switch to Instagram resolution, or back to the default.
Pressing render will render 5 images, one image for each viewand 1 combined image of all 4 views.
By default the selected folder will open once the rendering is done.
标签: blender 插件 软件 相机 视图 工具 视角
分类:资源 > 软件资源 > Blender及其插件
发布:CGer | 查看: | 发表时间:2024/8/27 22:41:32 | 更新时间:2025/4/5 12:06:07
| 常见问题,点击查询: | ||
| ●CGer(Cg儿)资源下载帮助 | ||
| ●资源名词解释 | ||
| ●注册/登陆问题 | ||
| ●充值出错/修改密码/忘记密码 | ||
| ●充值赠送系统 | ||
| ●文件解压出错/解压密码 | ||
| ●Payment with Paypal | ||
| ●哪些资源会被列为付费资源 | ||
| ●为何要充值解锁 | ||
| ●免责条款 | ||
| ●联系站长(联系站长前请先仔细阅读 免责条款 ,网站只提供资源,不提供软件安装等服务!) | ||
-

网站置顶/公示帖集合
205 0 1
资源 > 软件资源 > Blender及其插件
-

网站置顶/公示帖集合
120 0 0
资源 > 软件资源 > Blender及其插件
-

网站置顶/公示帖集合
3589 0 9
资源 > 软件资源 > Blender及其插件


