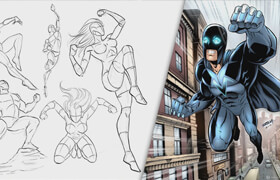
Stevie Keen讲解的photoshop教程,教会你如何在你的照片里加上大气和雾效这类效果,从头到尾一步一步地讲解,涉及到蒙版,笔刷,钢笔,曲线,色调调节等工具的使用。
Phamily Photo
Today we’re doing another start to finish edit! This image was submitted by Stevie Keen. In the Suggest an Episode section you can send us any photo you’d like to see edited here in an episode. Let us know what you would like to see done!
What’s Covered
First I’ll start off with curves to slightly darken the highlight areas. Using Apply Image with a layer mask will make this layer more visible in the lighter areas, fixing any exposure problems. Next I’ll use a custom brush to add in more fog. This looks the most natural when its built up slowly in layers. Using a darker color and then lighter on top will make it look realistic.
Download your free brush HERE
After we finish building up the fog I’ll select out the tree using the lasso tool for the layer mask. The pen tool is great for making selections that are crisp and clean, but for this I’ll use the lasso tool to mimc the rough edge of the tree.
Lastly I’ll add in some color toning using levels and curves. Color is a great way to add mood and effect to your photos and can be done in a few simple steps.
Episode Timeline
0:30- Instagram
0:50- Contest Winners
1:35- Starting with curves
1:45- Apply Image
2:15- Using a custom brush for fog
3:00- Building the effect
4:05- Adding blue using levels adjustment layer
4:35- Making a selection with the lasso tool for the layer mask
6:00- Color toning using levels
7:00- Curves
7:45- Adding gradients to darken
8:10- Fading out the fog
9:10- Using the high pass filter to sharpen
10:00- Burning using a darken blend mode
10:40- New texture contest
.jpg)
标签: PS教程 photoshop教程 后期教程
分类:教程 > 2D教程 > 插画手绘
发布:CGer | 查看: | 发表时间:2013/7/1 13:48:47 | 更新时间:2025/4/4 23:22:10
| 常见问题,点击查询: | ||
| ●CGer(Cg儿)资源下载帮助 | ||
| ●资源名词解释 | ||
| ●注册/登陆问题 | ||
| ●充值出错/修改密码/忘记密码 | ||
| ●充值赠送系统 | ||
| ●文件解压出错/解压密码 | ||
| ●Payment with Paypal | ||
| ●哪些资源会被列为付费资源 | ||
| ●为何要充值解锁 | ||
| ●免责条款 | ||
| ●联系站长(联系站长前请先仔细阅读 免责条款 ,网站只提供资源,不提供软件安装等服务!) | ||


