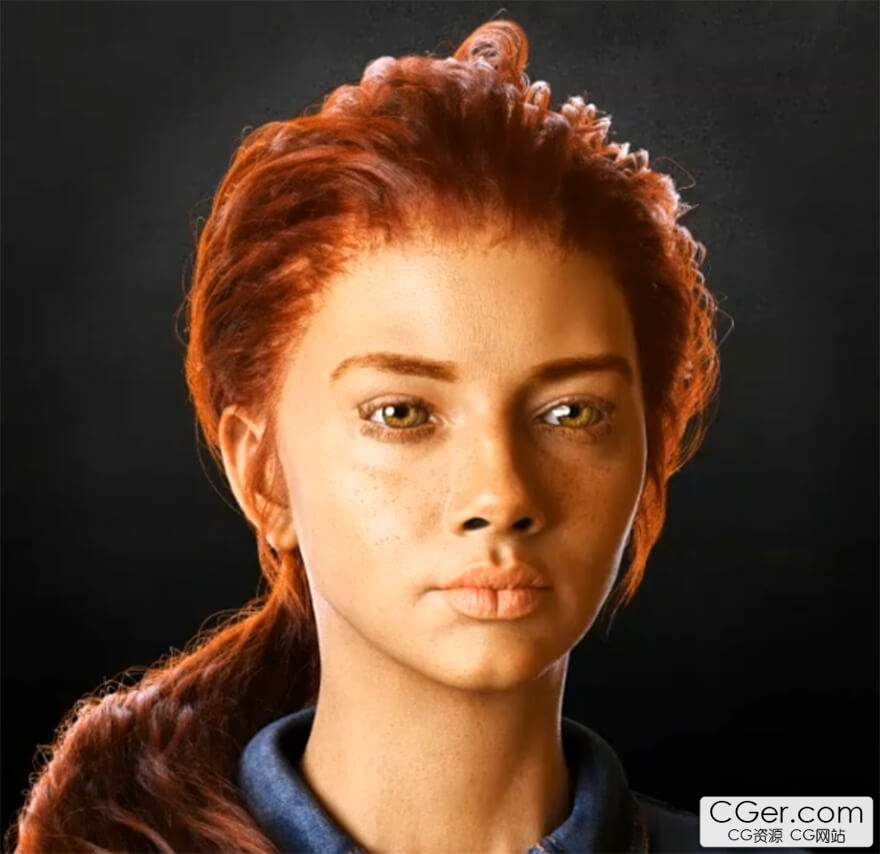
Udemy - REALISTIC 3D FEMALE FACE by Kelechi John
Udemy - 逼真的3D女性脸部建模教程,作者: 凯莱奇·约翰,30.6GB.
在这个逼真的女性脸部创作教程中,您将学习如何在 Maya 中将基础网格体变成逼真的脸!了解从 zbrush 中的第一个画笔描边到Maya 中最终逼真的渲染的完整工作流程。在本课程结束时,您将能够使用简单而强大的技术从参考到完成的 3D 模型创建自己的角色 vfx/游戏角色。
我们将专注于角色的面部和服装,尤其是面部,因为它通常是最复杂和最重要的部分。它将使我们能够讨论诸如面部解剖学,微观细节,服装重新拓扑学以及如何解决您在工作中遇到的常见纹理挑战等主题。

使用软件:
ADOBE PHOTOSHOP
AUTODESK MAYA
MAXON ZBRUSH
XGEN FOR MAYA
ADOBE SUBSTANCE PAINTER
PRODUCT DESCRIPTION
In this realistic female face, you’ll learn how to turn a base mesh into a realistic face in maya! Learn the full workflow from the first brush stroke in zbrush to the final realistic render in maya. By the end of this course, you’ll be able create your own characters vfx/game character from reference to finished 3d model, using simple and powerful techniques.
We'll be focusing on the face and clothing of the character but particularly the face since it's commonly the most complicated and important part. It'll allow us to talk about topics such as facial anatomy, micro detailing, garment retopology, and how to solve common texturing challenges you'll encounter in your work.
Covering the Full Process
We’re starting talking about how to align reference in photoshop
Facial Anatomy
Then prepping our model in maya and importing it zbrush, covering all specific steps and settings. From there we’ll give the character skin details using tileable maps in combination texturingxyz maps, you’ll learn powerful techniques using Smart Masks to significantly speed up texturing. Once our skin details are done, we’re starting on the color map using fill layers, creating the color map one layer at a time. You’ll also understand how to create simple and powerful roughness maps to make your characters pop.
Skin Shading Made Simple
Having done the first pass on all the base maps, we’re bringing the textures into Arnold, where we’ll set up the skin shader. Skin shading can be an incredibly complicated process, so we’ll be sure to make it simple and easy to understand. With a first pass of the skin shading done, this is the step where the character is coming together. We’re also using the FlippedNormals Eye kit, to make the character feel truly alive.
Professional and Tested Texturing Workflow
You'll learn a professsional way of sculpting likeness,exporting maps in zbrush, texturing in substance painter, working with xgen in creating hair and look develop for skin and hair in arnold, covering both texturing in Painter as well as skin shading in Arnold. This is a fast and industry-proven way of working, giving you a solid framework for all your future characters.
Skill Level
Character Face creation is perfect for 3D artists with an intermediate understanding of zbrush, Maya, and Substance. And who are interested in taking their character design to the next level! We recommend that you know how to use both Substance Painter, Maya and zbrush, as we're focusing on texturing and shading workflows, instead of going through features A-Z.
标签: maya zb 玛雅 角色 建模 材质 教程
分类:教程 > 3D教程 > Maya
发布:CGer | 查看: | 发表时间:2023/5/19 11:19:39 | 更新时间:2025/4/5 11:36:43
—————————————————————————————————————————————— | ||
| 哪些资源会被列为付费资源? ●站长付费购买的资源,站长从其他途径付费购买的资源。 ●资源包体积巨大,需要大量时间上传,占用大量存储空间的资源。(目前超过10GB的资源可能会列为付费资源) ●内容经常被某些人倒卖并恶意举报的资源,收费可以减少恶意举报的概率。 ●稀少的和高质量的资源。 |
| 常见问题,点击查询: | ||
| ●CGer(Cg儿)资源下载帮助 | ||
| ●资源名词解释 | ||
| ●注册/登陆问题 | ||
| ●充值出错/修改密码/忘记密码 | ||
| ●充值赠送系统 | ||
| ●文件解压出错/解压密码 | ||
| ●Payment with Paypal | ||
| ●哪些资源会被列为付费资源 | ||
| ●为何要充值解锁 | ||
| ●免责条款 | ||
| ●联系站长(联系站长前请先仔细阅读 免责条款 ,网站只提供资源,不提供软件安装等服务!) | ||


